Serve images with Cloudfront + S3

To Do :-

  • Create a S3 Bucket.
  • Create Cloudfront Distributions.
  • Check the bucket policy of S3.
  • Operation Check.

Create a S3 Bucket :-

  • Open “Services> S3”. Then, create an S3 bucket with all recommended settings.
  • Block all public access as shown in below.

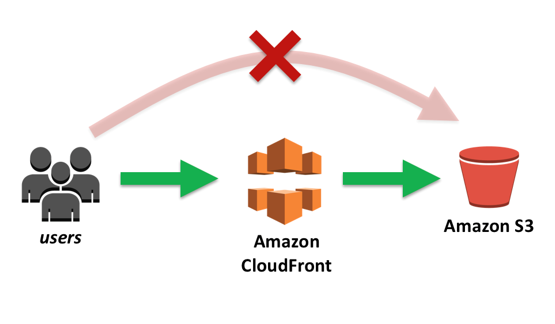
Create Cloudfront Distributions :-

Open “Services > Cloudfront”. Then, click create distribution.

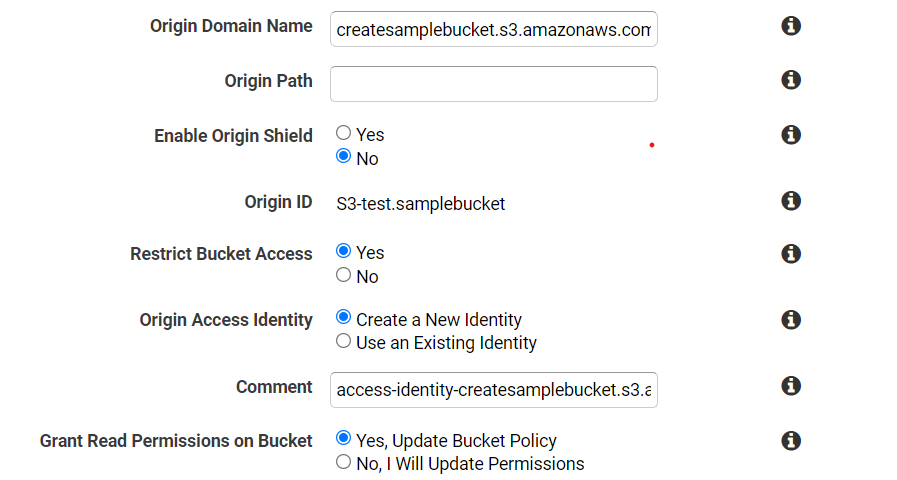
Follow the below instructions.

  • Origin Domain Name: [Your S3 buckets] Select the S3 bucket made in 
  • Restrict Bucket Access: Yes If you set this to Yes, you can restrict access to S3 only from Cloudfront. 
  • Origin Access Identity: If you are the first to create Cloudfront Distribution, select “Create a New Identity”. If you already created an “origin access identity”, you can select it in “Use an Existing Identity”. One “origin access identity” is usually sufficient.
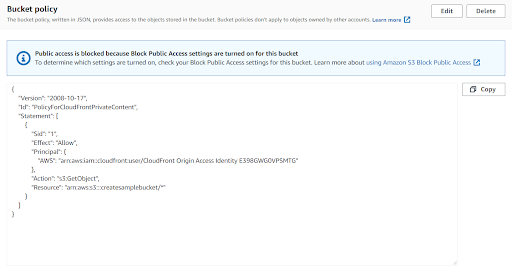
  • Grant Read Permissions on Bucket: Yes, Update Bucket Policy If this is set to “Yes”, a policy setting will be automatically added to S3’s Bucket Policy. See # 3 for details.

It will look like this in the distribution settings.

  • Then, leave the remaining fields as default (or) recommended settings in the distribution fields.
  • Then, create distribution.

Check the bucket policy of S3 :-

You can check the bucket policy in “Services> S3 > [Your bucket] > Permissions > Bucket Policy”.

The bucket will automatically get updated in the bucket policy.

Upload an image to S3 for testing. Make all the values default (recommended values).

Then First, open the S3 “Object URL” and check that it becomes “Access Denied”.

Next, open Cloud Front’s “Domain Name” and check that the image is displayed.

Eg: – cloudfrontsdomainname/imagenameins3